Last weekend, Wendy made a trip from SF to Santa Cruz and back. The people on her boat told her that it's a tradition to drink a shot of bitters at the end of a sailor's longest journey. Never heard of that before and I'm sure it was just and excuse to get her wasted. (Nothing wrong with that -- I do it all the time).
During some research into nautical traditions, Wendy turned up this page which gives some interested insights in the sources of modern-day language: http://www.shipsandcruises.com/nautical_notes.htm
Wednesday, May 28, 2008

Saturday, May 24, 2008
The Shakedown
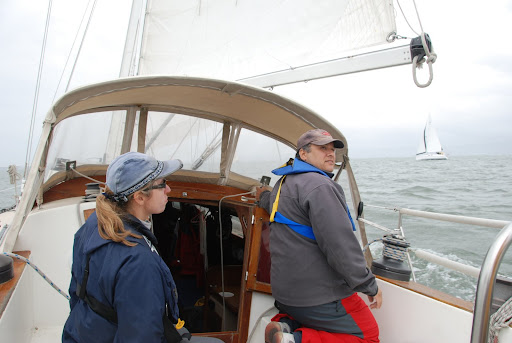
Woohoo! The boat's ready to sail and I can finally get it out of the yard. Since I bought the boat I've hardly been sailing at all. Today's the big shakedown. I'm moving it from the yard back to the slip at Emeryville with Jonathan, Russ and Maureen's help. Jonathan's the previous owner and Russ owns another Newport 41. Sad that Wendy couldn't make it for today. She's sailing to Santa Cruz and back - I left the good booze back at home.
I had the boat hauled out for the survey at the start of December. Since mid January, I've been thinking, "just another two weeks and it'll finished for sure." It pretty much eaten my weekends between then and now and has been a big source of tension between Wendy and I.
So what's happened in the last months? Here's a list of the work that the yard did:
Things the yard said they'd do and decided they couldn't get around to:
Things that went wrong:
Other work we've done while the boat has been out of the water includes:
Wendy, Jonathan and Eric have helped out with a lot of this. Russ has also been a big help and constant source of advice. He also found the new halyards on Craigslist and put in eye slices and shackles.
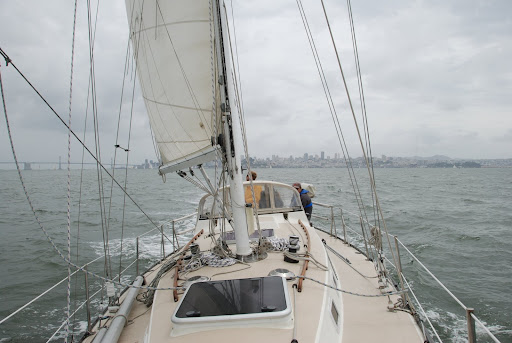
When I got to the boat, I was happy to find that the yard had heard that we'd got the engine running earlier in the week and had moved the boat out its place 3 deep in a raft and onto the long dock. We had to wait a hour or so for the tide to give us clearance. The engine fired up nicely and after swinging after the nose at the dock, we made our way into the channel. The new sheaves and newly greased track worked great and the main went up very easily. We received some cheerios from people at the dock who'd been watching the work on the boat and made our way out into the Bay and up to Alcatraz.
The boat seemed to handle just fine. The new rigging looked great. Russ noted that the lowers looked a little slack, but the otherwise the mast looked pretty fine and Jonathan noted that the helm felt more balanced than it did previously. Weather was overcast with a brisk breeze.
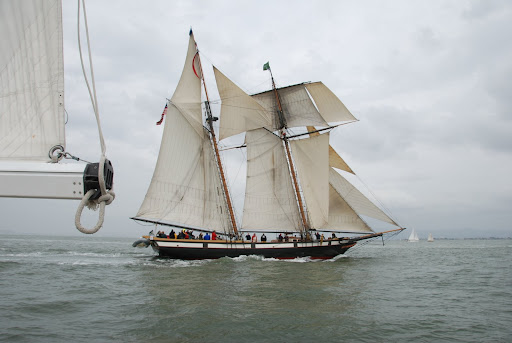
Up around Alcatraz we cross the path of the Master Mariner's Race where all the old woodies compete. We followed the race for a while and crashed their finish line before putting the boat back home in Emeryville.

I had the boat hauled out for the survey at the start of December. Since mid January, I've been thinking, "just another two weeks and it'll finished for sure." It pretty much eaten my weekends between then and now and has been a big source of tension between Wendy and I.
So what's happened in the last months? Here's a list of the work that the yard did:
- Pull mast, install rigging, re-install mast and tune rigging
- Install new VHF antenna
- Repaint bottom
- Service propeller
- Install mast boot
- Fabricate new backstay chainplate
- Replaced two broken ball valves
- Install dripless stuffing box
Things the yard said they'd do and decided they couldn't get around to:
- Relocate propane tank
- Install a sump pump for the shower
Things that went wrong:
- When the boat was on the hard, I tested the through-hull ball valves. One of them had become jammed. Closer inspection revealed that in this and in another, the stem from the handle to the ball had sheared. I can't underestimate how serious a problem this could have turned out to be -- the valves gave the appearance of being closed when, in fact, they were open to the sea. Its the kind of thing you'd hope that your surveyor would spot. I figure she *must* have at least exercised all the handles... but then, if she did, I'm not sure how the problem developed while the boat was out of the water.
- I didn't get the yard to agree to a time-line for the work they did -- so, it took from December to May for a half finished job.
- Either the yard or the riggers mis-measured the original rigging and so new SS wire was cut too short for my mast. Luckily, I'd asked the the riggers to keep the original rigging so they were to (eventually) able to fix the problem.
- The yard's crane squirted oil all over my deck leaving quite a few large stains.
- I broke the bleed valve banjo bolt when I overtightened it. It took over a month dealing with parts distributors to get a replacement that didn't fit.
- I wish I'd completely de-rigged the mast and put the contents of the boat and the sails into storage. Would have made working much easier.
- I broke off the masthead fly while working on the mast.
- A friend of mine, Paul, noticed that the yard hadn't tightened one of the locking nuts on my forestay. Furling up the jib could have unscrewed my forestay...
- The mast boot the yard installed was a pretty shoddy job. It had split along the length of the boom-vang bracket a week after they fitted it. I brought it up with them and they wrapped more tape over the top. Not sure whether it will seal. We'll see. Looks pretty ugly.
Other work we've done while the boat has been out of the water includes:
- Installed new lifelines
- Removed SS mast fittings, sanded, primed, and painted mast beneath, and rebedded fittings
- Installed new anchor/tricolor light
- Design aluminium riser mount for masthead light and has it machined
- Installed new steaming light
- Ran new electrical wiring from thoughout mast to distribution panel
- Rebedded all chainplate covers
- Replaced wiring from bilge pump and float switch to distribution panel
- Replaced masthead sheaves with roller-bearing sheaves
- Replaced two fraying wire halyards with rope
- Polished topsides
- Greased mast track
- Replaced masthead fly
- Replaced docklines and fenders
- Repainted mast-step (and replaced lucky coin)
- De-rigged and rerigged boom
- Changed primary fuel filter
- Had new banjo bolt fabricated
- Replaced engine fresh water pump gasket
- Pumped out leaked coolant from bilge
Wendy, Jonathan and Eric have helped out with a lot of this. Russ has also been a big help and constant source of advice. He also found the new halyards on Craigslist and put in eye slices and shackles.
When I got to the boat, I was happy to find that the yard had heard that we'd got the engine running earlier in the week and had moved the boat out its place 3 deep in a raft and onto the long dock. We had to wait a hour or so for the tide to give us clearance. The engine fired up nicely and after swinging after the nose at the dock, we made our way into the channel. The new sheaves and newly greased track worked great and the main went up very easily. We received some cheerios from people at the dock who'd been watching the work on the boat and made our way out into the Bay and up to Alcatraz.
The boat seemed to handle just fine. The new rigging looked great. Russ noted that the lowers looked a little slack, but the otherwise the mast looked pretty fine and Jonathan noted that the helm felt more balanced than it did previously. Weather was overcast with a brisk breeze.
Up around Alcatraz we cross the path of the Master Mariner's Race where all the old woodies compete. We followed the race for a while and crashed their finish line before putting the boat back home in Emeryville.

Thursday, May 22, 2008
New Banjo Bolt
So, the broken banjo bolt has caused a lot of problems. The part is out of stock everywhere. I contacted Torresen Marine who contacted Westerbeke (who supply parts for my now obsolete Universal 5432). Westerbeke said they'd need to make new parts and it would take 7-10 days. They missed two ETAs to Torresen and when the part finally showed up, about three weeks later, it turned out to be the wrong part (it was a different part of the same assembly). I ordered another part the next day (which they did have in stock) by overnight delivery from the East coast. This turned out to be the right part but had the wrong diameter screw for my model of engine. So, about 4 weeks into this issue, I was back where I started.
Here's a picture of the bleed valve assembly.

I took the broken screw into a local machine shop who were able to make a new one for $75 (about the cost of overnight delivery from the East coast) and took two days. Wendy and I rushed it to the boat and had the engine running in about 10 minutes. She said I was grinning like a madman.
That's the last of the critical systems repaired and the boat's now good to go.
Sadly, we couldn't take the boat out of the yard because its jammed in three deep at the dock and we need to get the yard to move the rafters.
Bah!
I'm a little miffed that the yard still hadn't (and don't plan to) do some of the work I asked them to do back in December. They were supposed to re-install my propane locker in the stern locker with a new overboard vent in the transom, and also fit a sump pump to the shower (which drains into the bilge). At some point they decided that its not worth their effort. Its a pretty slack state of affairs, but what can you do...
Here's a picture of the bleed valve assembly.

I took the broken screw into a local machine shop who were able to make a new one for $75 (about the cost of overnight delivery from the East coast) and took two days. Wendy and I rushed it to the boat and had the engine running in about 10 minutes. She said I was grinning like a madman.
That's the last of the critical systems repaired and the boat's now good to go.
Sadly, we couldn't take the boat out of the yard because its jammed in three deep at the dock and we need to get the yard to move the rafters.
Bah!
I'm a little miffed that the yard still hadn't (and don't plan to) do some of the work I asked them to do back in December. They were supposed to re-install my propane locker in the stern locker with a new overboard vent in the transom, and also fit a sump pump to the shower (which drains into the bilge). At some point they decided that its not worth their effort. Its a pretty slack state of affairs, but what can you do...
Saturday, May 10, 2008
KFOG KABOOM
My friend Adrian is in town, visiting from England and so Wendy and I took out one of the club's J24s to give him a tour around the bay, finishing up with the KFOG fireworks display under the bay bridge. It was howling today. We put on the 80% and a reef in at the dock -- the first time I've ever felt the need. I'm glad I did. The boat got battered on the upwind leg to Alcatraz. Cold. Wet. And the fog started rolling in two hours before sunset. We abandoned our plans to get to the Golden Gate and headed to be in sight of the city front before the fog caught up with us. Under the Bay Bridge was a parking lot. We anchored and rafted up with a friend of ours. Wine. Cheese and Crackers. Cocoa. Mmmm...
Sailing back to Berkeley was a bitch in dark and the limited visibility from the fog. Made for a lot of tension.


Sailing back to Berkeley was a bitch in dark and the limited visibility from the fog. Made for a lot of tension.


Sunday, May 04, 2008
Raise the Main (Girlfriend)!
Or: Send Up The Number One.
Getting a little frustrated with the boat being back in the water so Wendy took Patrick, Eric and I out on one of the club's J24s. We stopped off at Sam's for lunch and Bloody Mary's.
On the way back around the North side of Angel Island, my beloved Delta Ditch Mount Gay Rum hat blew off in the stiff breeze. All those expensive sailing lessons paid off though and I managed to snag it first time.
Back at the dock, we sent Wendy up the mast. Why? Why not? Perhaps just a way to make sure that the new halyards and sheaves work like they should and that nothing will break unexpectedly. Some of the blocks hadn't been used in a little while and made terrifying squeaking noise as we hoisted her up.


Terrified? Hmmm... looks like the shackle pin could use some seizing wire...

Getting a little frustrated with the boat being back in the water so Wendy took Patrick, Eric and I out on one of the club's J24s. We stopped off at Sam's for lunch and Bloody Mary's.
On the way back around the North side of Angel Island, my beloved Delta Ditch Mount Gay Rum hat blew off in the stiff breeze. All those expensive sailing lessons paid off though and I managed to snag it first time.
Back at the dock, we sent Wendy up the mast. Why? Why not? Perhaps just a way to make sure that the new halyards and sheaves work like they should and that nothing will break unexpectedly. Some of the blocks hadn't been used in a little while and made terrifying squeaking noise as we hoisted her up.


Terrified? Hmmm... looks like the shackle pin could use some seizing wire...

Saturday, April 12, 2008
Back in the water!

Well, North Star's back in the water. Feels great I can tell you. Been a long time. Glad to find that the new dripless stuffing box doesn't drip and that the new through-hulls keep the water out.

So with the boat back in the water and re-rigged, Wendy and I thought we'd take the boat out for for the day. We had no luck cranking the engine -- the starter turned but nothing fired up. On a friend's advice I decided to bleed air from the fuel system. I loosened the bleed valve and Wendy pumped the lift pumped until fuel squirted out. We tried the starter again and still no luck.
Wendy went to find help -- coming back with Bruce, one of the OCSC instructors. As he came down the companionway, I was re-tightened the bleed screw which very softly sheered off (see above). "Whoops!" were Bruce's words. Bruce heard me swear like a sailor.
So began the search for a new banjo bolt...
Sunday, February 10, 2008
Installing Achor/Tricolor Light
The weather has been foul, but got a break from the rain this weekend which means that I can finally paint and bed my anchor light.
I bought the unit several weeks ago from Ahoy Captain. Its a fancy LED Lopolight. Because of its low profile, I couldn't install it directly onto the mast as the top of the mast would obscures the view from nearby traffic. I made some sketches of a riser mount and took them into TAP Plastics to get it fabricated. Unfortunately, they only work with plastic sheet and don't have material thick enough to provide sufficient height for the riser. Several sheets can be glued together, but UV-resistant type of plastic (polyethylene) doesn't not bond well. Basically, I ran out of options with them and took it to a local machine shop (who also enlarged one of the bushing on my sheaves that were made too small).
They have a CNC lathe and knocked out the piece in a aluminium couple of hours. Fine job. I wanted to get it hard anodized but couldn't get this done in time for the weekend, so I prepped it with aluminium primer, a coat of epoxy paint and a coat of gloss. Turned out nice.
The unit's pretty lightweight and is extremely secure -- the screws I drilled into the mast are blocked from unscrewing out by the light itself. Pretty pleased with it if I do say myself.


I also replaced the masthead fly this weekend. While I was working on the sheaves, I stood up and snapped the tail off the old one. Bah! New one was snap to install though, and the tricolor should let my see which way the wind is coming at night.
I bought the unit several weeks ago from Ahoy Captain. Its a fancy LED Lopolight. Because of its low profile, I couldn't install it directly onto the mast as the top of the mast would obscures the view from nearby traffic. I made some sketches of a riser mount and took them into TAP Plastics to get it fabricated. Unfortunately, they only work with plastic sheet and don't have material thick enough to provide sufficient height for the riser. Several sheets can be glued together, but UV-resistant type of plastic (polyethylene) doesn't not bond well. Basically, I ran out of options with them and took it to a local machine shop (who also enlarged one of the bushing on my sheaves that were made too small).
They have a CNC lathe and knocked out the piece in a aluminium couple of hours. Fine job. I wanted to get it hard anodized but couldn't get this done in time for the weekend, so I prepped it with aluminium primer, a coat of epoxy paint and a coat of gloss. Turned out nice.
The unit's pretty lightweight and is extremely secure -- the screws I drilled into the mast are blocked from unscrewing out by the light itself. Pretty pleased with it if I do say myself.


I also replaced the masthead fly this weekend. While I was working on the sheaves, I stood up and snapped the tail off the old one. Bah! New one was snap to install though, and the tricolor should let my see which way the wind is coming at night.
Saturday, February 02, 2008
Lucky Coins: Do Not Remove!
During the property boom of the 80's, our family upped sticks and moved from Birmingham into a big old house in the Malvern Hills. My parents had bought a fixer upper. Dad had quit his job to work on the house. At some point during the renovation he and his friend Vic, a court judge, were working in the attic putting down insulation and laying boards. Vic found an old coin nailed into one of the roof joists which he pulled out, presumably so he could get a good look at it.
Traditional is, when building a house, to nail a coin into the rafters for luck. Whether or not I believe this I don't know, but I'll tell you that within a two weeks Vic was dead. He died from a heart attack.
Which bring me to today's projects. Repainting the mast step and installing new masthead sheaves. Metal masts have plenty of holes allowing water and dirt wash down the inside. Water pours out through weep holes in the bottom, but inevitably dirt and all sorts of gunk collect in the mast step. So, while digging out the gunk, what should I find but an old coin. A 1967 quarter encased in sealant and glued to the mast step:

My boat was built in 1982. The Newport 41 owner's list however shows models dating back to 1969 -- I expect 1967 is the year Capital Yatchs was founded.
After a cleanup, prep and a new lick of paint on the step, I was careful to put the coin back just where I found it.


Wendy and I also installed the new masthead sheaves. It was pouring with rain, but the yard are waiting on this to put the mast back in, so it can't wait. Wendy's such a trooper.

Traditional is, when building a house, to nail a coin into the rafters for luck. Whether or not I believe this I don't know, but I'll tell you that within a two weeks Vic was dead. He died from a heart attack.
Which bring me to today's projects. Repainting the mast step and installing new masthead sheaves. Metal masts have plenty of holes allowing water and dirt wash down the inside. Water pours out through weep holes in the bottom, but inevitably dirt and all sorts of gunk collect in the mast step. So, while digging out the gunk, what should I find but an old coin. A 1967 quarter encased in sealant and glued to the mast step:

My boat was built in 1982. The Newport 41 owner's list however shows models dating back to 1969 -- I expect 1967 is the year Capital Yatchs was founded.
After a cleanup, prep and a new lick of paint on the step, I was careful to put the coin back just where I found it.


Wendy and I also installed the new masthead sheaves. It was pouring with rain, but the yard are waiting on this to put the mast back in, so it can't wait. Wendy's such a trooper.

Sunday, January 06, 2008
Rivets
Finally removed the rivets holding on my old VHF mounting plate to the top of my mast. Had to drill off the rivet heads and then tap out the rivet pins. Because the rivets were stainless steel rather than aluminum I needed to buy a cobalt drill bit for the job and run the motor at low speed. It took about 25 minutes to drill out 3 rivets and it looks like it used up the drill bit by the end.
Aluminum Corrosion
My mast has a few spots where the metal has started to corrode. It looks like in most places, this has been caused by stainless steel items mounted on the mast (for example, the mounting bracket for the VHF antenna).
My job for this weekend is to remove these items and clean up the mast.
Some of the fittings are riveted to the mast. I need to find a way of removing these. I think if I try and drill them out, the rivets will just spin in place.
I'm also installing new lights at the top of the mast. I need to find a way of securing the electrical cables and the VHF cable at the top of the mast so that they're not secured by the equipment alone.
My job for this weekend is to remove these items and clean up the mast.
- sand down with paper and brush
- apply etching paint and wash
- apply expoy primer
- paint with aluminum spar paint
Some of the fittings are riveted to the mast. I need to find a way of removing these. I think if I try and drill them out, the rivets will just spin in place.
I'm also installing new lights at the top of the mast. I need to find a way of securing the electrical cables and the VHF cable at the top of the mast so that they're not secured by the equipment alone.
Saturday, January 05, 2008
Steaming Light Flooded
Checked on the boat this weekend and found that the rain had flooded out the steaming light. Seems like the light isn't designed to be waterproof, especially when oriented this way round. Gonna replace it with a new one.


Sunday, December 30, 2007
Rebdedding Chainplates
I've been doing a lot of research on how maintain my boat. I figure that if I write it down somewhere, I'll remember it a lot better.
I need to rebed the chainplates on my boat. Everything that goes through the deck is a place for water to get in causing rot and corrosion. Waterproof seals are needed. One thing that's been puzzling me a lot is exactly what this involves. Here's what I've found:
I need to rebed the chainplates on my boat. Everything that goes through the deck is a place for water to get in causing rot and corrosion. Waterproof seals are needed. One thing that's been puzzling me a lot is exactly what this involves. Here's what I've found:
- clean the surfaces to be sealed (the deck hardware and deck). These need to be squeaky clean to ensure a good seal so use wire brushes then polish with acetone.
- apply masking tape around the fitting and the deck. This will keep the sealant in the seal and nowhere else (e.g. on the deck and the fitting) and will make the cleanup easy.
- lift the fitting, and squirt in the sealant on the deck and on the fitting. For through-bolts, squirt a ring of sealant around the bolt.
- wait for the sealant to partially cure (30 mins for silicone), before tightening the fitting on the deck. This is to ensure that the sealant is compressed between to the fitting and the deck and not squirted out.
- Wait for full cure (usually 24 hours) and clean up. Carefully cut around the edges with a knife and remove the tape.
Marine silicone sealant works well for most purposes, although silicone cannot be used for sealing certain plastics.
About the boat.
I've just bought a Newport 41 from a friend of mine. She's a sailboat that friendly enough to deal with the regular 25-35 knots we get here in San Francisco Bay, old enough so that I can maintain her myself without descreasing her value. She has enough standing room and space enough to be liveable. And, perhaps most importantly, I can afford her. Having moved to the US from the UK means that I've had trouble getting boat loans. My credit union agreed to finance 50% of this one.
I've got half an idea of moving into the boat in a few months. We'll see how it goes.
I had the boat surveyed about a month ago. Although there's quite a list of issues (which is what you'll always get if your surveyor is good), the surveyor like the boat quite a lot. So, after some wrangling with the bank and emptying my piggy bank of savings, I bought the boat.

What work needs to be done?
Plenty! The boat's hauled out at yard at the moment. Here are my immediate plans:
I've got half an idea of moving into the boat in a few months. We'll see how it goes.
I had the boat surveyed about a month ago. Although there's quite a list of issues (which is what you'll always get if your surveyor is good), the surveyor like the boat quite a lot. So, after some wrangling with the bank and emptying my piggy bank of savings, I bought the boat.

What work needs to be done?
Plenty! The boat's hauled out at yard at the moment. Here are my immediate plans:
- Replace the standing rigging. She was originally a racer-cruiser design and so was originally fitted with beautiful solid rod rigging. The purpose of the rigging it to support the mast. From the top of the mast, "stays" support the mast fore and aft and "shrouds" from each side. Rod rigging has the advantage of reducing the weight up high. This in turn keeps the boat more level and allows it to sail better (faster and closer to wind).
However, the rod looks like it dates back from the boat's original construction, making it over 25 years old. Some people say rod rigging can last pretty much indefinitely. Unless it has been fractured, shows signs of pitting or corrosion then, in theory, it should be sound. However, the downside of rod rigging is that it is generally very hard to determine when it is time to replace it. Rod rigging failure is generally catastrophic - happening without warning and in heavy wind conditions. A fully loaded sail pulls tons of force on the rigging. If it fails, the mast will likely break. At best, repair would be extremely expensive. At worst, it could lead to fatal injuries. So, clearly some serious thought required about this.
Replacement rod is prohibitively expensive these days (x3 the cost of replacing it with stainless steel wire). I'll be refitting with wire.
My surveyor recommended replacement, as did the original riggers and my local rigger (all of whom have either liability or financial motives from recommending replacement). It hurts the old salts at my boat yard and sailing club to see my rod rigging go and recommended keeping it - other than its age, there's really little evidence that it needs to go. I think they feel the boat will be castrated. Frankly, I think this is the wrong way to think about it. This boat's competitive racing days are long gone, and the safety of the people who sail in her are my responsibility.
Replacing the rigging will be very expensive. However, it's cheaper than a new mast and buys peace of mind and confidence to go out to places where fears about the integrity of the rigging would otherwise prevent me. - Move the propane tank to the stern locker. Unlike in Europe, boats in the US generally use propane as fuel for the galley stove. Propane has a higher calorific value than natural gas, meaning smaller gas tanks, and also produces less water vapor (and so condensation), thus keeping the interior drier. However, unlike natural gas, propane is heavier than air. Leaks flow into and fill the interior of the boat, causing explosions the next time any electrical switch it used. Propane tanks should be kept in lockers than contain a dedicated drain in the bottom that leads directly overboard. The boat does already have such a locker. However, the drain in the bottom of the locker leads overboard at a point above the top of the locker. This is so stupid it is untrue. Leaking gas will spill out of the top of the locker before it reaches the overboard drain. However installed this needs beating around the head.
I'm going to get my yard to relocate the propane tank to the stern locker and have them add a new drain through the transom. - Replace the lifelines. Lifelines are steel wires that surround the topsides of the boat to keep people from falling off the boat. They're rusty and its time to replace them. This should be done as soon as possible -- while the boat is out of the water, it's quite a nasty fall to the concrete below.
- Replace the stuffing box with a dripless one. The propeller shaft connects the engine to the propeller. The engine is on the inside and the propeller is on the outside. The shaft passes through the stuffing box and the waxy-fiber packing material inside wrapped tightly around the shaft keeps the water on the water outside. Well, almost. Older stuffing boxes (like mine) require a small amount of water to seep in in order to lubricate the packing material. This leaks in to the bilges (the lowest parts of a boat's interior) and sits there until it is pumped out.
It turns out that the aulminum fuel tank on my boat also sits in the bilge. This is daft design flaw that ensures that, unless the bliges are kept dry, the fuel tank will eventually corrode away.
So, a dripless stuffng box it is. - Mast work. Since the mast needs to be pulled out in order to replace the rigging, now is a good time to do work on the mast. Hopefully, it'll be another 10 years before it needs to be pulled again. I'm going to replace the wiring, install an anchor light, replace the VHF antenna and maybe replace the wind instruments. There's a few spots of corrosion too where steel fitting have been mounted onto almunium plates. These probably
- Similarly, while the mast it out, now would be a good time to pull out, clean, inspect and rebed my chainplates. The chainplates are stainless steel fittings that connect the rigging to the hull through the deck. Chainplate failure has the same consequences as rigging failure. The plates pass through the deck and the portion inside the deck should be inspected.
That's about it for now. I'm back in the UK for christmas with my mom and brother. There will be plenty to be getting on with when I get back.
New Boat! Woohoo!
OK. Time to get this blog off the ground.
I tried starting a blog a while back to cover moving the USA from England. It was a pretty stressful time and keeping a diary of sorts seemed a pretty great way to keep an eye on what's going on in my life and makes a good way to keep in contact with friends.
All went well until my computer melted down one hot summer killing everything I'd written.
So, the blog is back. Plenty has happened in between. Got a new girl. Bought a boat. And Dad died.
I tried starting a blog a while back to cover moving the USA from England. It was a pretty stressful time and keeping a diary of sorts seemed a pretty great way to keep an eye on what's going on in my life and makes a good way to keep in contact with friends.
All went well until my computer melted down one hot summer killing everything I'd written.
So, the blog is back. Plenty has happened in between. Got a new girl. Bought a boat. And Dad died.
Friday, December 07, 2007


Friday, July 27, 2007
Sail To Pillar Point
Pictures. Click. Click. Click.
Took these on North Star when it was Jonathan's -- before I bought it.
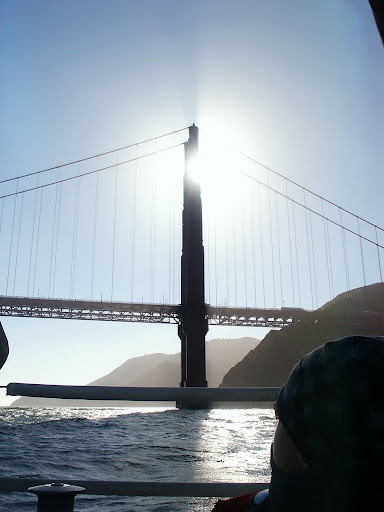
Took these on North Star when it was Jonathan's -- before I bought it.
Sunday, October 01, 2006

Saturday, September 30, 2006

Subscribe to:
Posts (Atom)